
-

-
Popular Posts
-
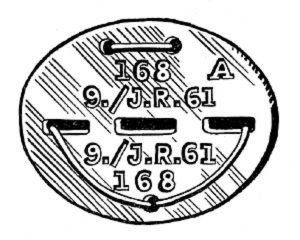 Erkennungsmarke (German Dog Tag)
From Handbook on German Army Identification, U.S. Milit...
Erkennungsmarke (German Dog Tag)
From Handbook on German Army Identification, U.S. Milit...
-
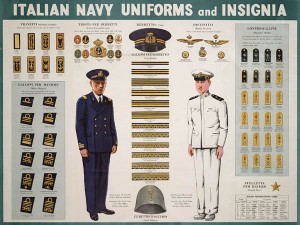 Italian Navy Uniforms and Insignia
:
CON...
Italian Navy Uniforms and Insignia
Italian Navy Uniforms and Insignia:
CON...
-
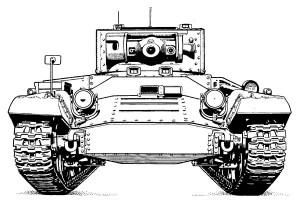 Valentine Tank Illustrations
Front and side views of the Valentine Tank (officially...
Valentine Tank Illustrations
Front and side views of the Valentine Tank (officially...
-
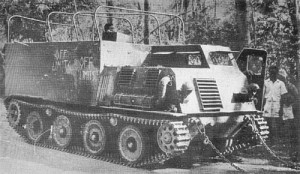 Japanese Type 1 Ho-Ki Armored Personnel Carrier
The Japanese produced a limited number of the innovativ...
Japanese Type 1 Ho-Ki Armored Personnel Carrier
The Japanese produced a limited number of the innovativ...
-
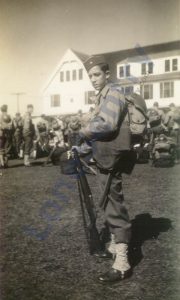 Early-War Uniform
A private photograph from 1942 showing details of the e...
Early-War Uniform
A private photograph from 1942 showing details of the e...
-
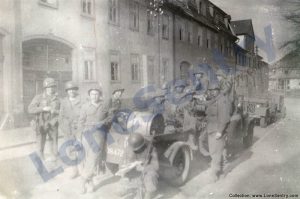 89th Infantry Division in Germany
Photographs of the U.S. Army's 89th Infantry ...
89th Infantry Division in Germany
Photographs of the U.S. Army's 89th Infantry ...
-
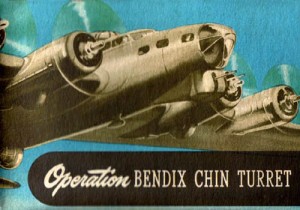 Bendix Chin Turret
Bendix manual on the Operation and Maintenance of the B...
Bendix Chin Turret
Bendix manual on the Operation and Maintenance of the B...
-
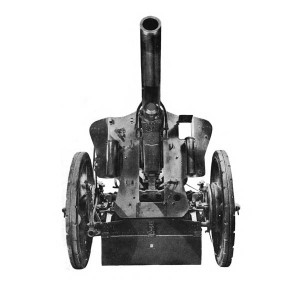 German 105-mm Howitzer
Three views of the German 105-mm howitzer (10.5 cm leFH...
German 105-mm Howitzer
Three views of the German 105-mm howitzer (10.5 cm leFH...
-
 How’s Your Sherman, Herman?
M4 Sherman Tank modification and upgrades from Army Mot...
How’s Your Sherman, Herman?
M4 Sherman Tank modification and upgrades from Army Mot...
-
Tag Archives: training
Keep Your Eyes on a Whirling Propeller
Posted in miscellaneous, publications, training
Tagged air force, cartoon, propeller, safety, training
Comments Off on Keep Your Eyes on a Whirling Propeller
Don’t Be A Dope V
Always check the oil! An angry tank crew stars in another “Don’t Be A Dope” training poster from Aberdeen Proving Grounds. The tank crew is sore as a boil For it ain’t according to Hoyle To get caught in … Continue reading
Low Banks Ain’t Healthy
Good advice from the Consolidated B-24D Liberator Pilot’s Manual.
Don’t Be A Dope IV
Another in the colorful series of “Don’t Be A Dope” training posters starring Joe Dope: Don’t wash vehicles in lakes, creeks or oceans, it ruins and corrodes delicate parts. Don’t be a dope! HANDLE EQUIPMENT RIGHT.
Lubbers Don’t Live
The U.S. Navy had their own series of training posters called “Lubbers Don’t Live”. This poster stars Whistlin’ Joe who goes overboard with a swish. Oh heed the fate of Whistlin’ Joe! // Forgot the life lines were so … Continue reading
Don’t Be A Dope III
Another “Don’t Be A Dope” training poster starring Joe Dope: When the Stukas begin to attack Ain’t the time to make up for a lack Of cleaning your gun – Which won’t shoot at a Hun With a month’s gummy … Continue reading
Tank Driving — Field Expedients
Tank driver instructions for dealing with mud, thrown tracks, and bellied tanks from From TM 21-306: Manual for the Full Track Vehicle Driver, War Department, August 1946. CHAPTER 6: FIELD EXPEDIENTS 32. GENERAL. Field expedients are based on a common sense … Continue reading
Don’t Be A Dope II
Another humorous “Don’t be a dope!” poster from WWII. Don’t be a dope! Handle Equipment Right! With an air of complete unconcern // Joe Dope speeds his Jeep ’round a turn // And slams on his brakes //At each stop … Continue reading