
-

-
Popular Posts
-
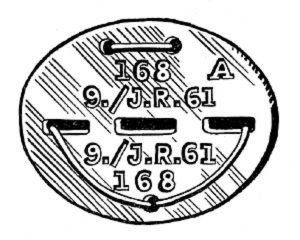 Erkennungsmarke (German Dog Tag)
From Handbook on German Army Identification, U.S. Milit...
Erkennungsmarke (German Dog Tag)
From Handbook on German Army Identification, U.S. Milit...
-
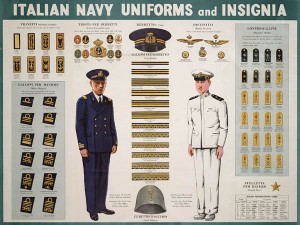 Italian Navy Uniforms and Insignia
:
CON...
Italian Navy Uniforms and Insignia
Italian Navy Uniforms and Insignia:
CON...
-
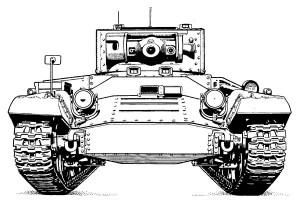 Valentine Tank Illustrations
Front and side views of the Valentine Tank (officially...
Valentine Tank Illustrations
Front and side views of the Valentine Tank (officially...
-
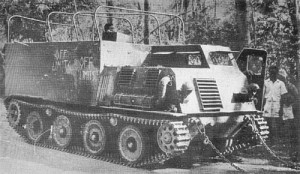 Japanese Type 1 Ho-Ki Armored Personnel Carrier
The Japanese produced a limited number of the innovativ...
Japanese Type 1 Ho-Ki Armored Personnel Carrier
The Japanese produced a limited number of the innovativ...
-
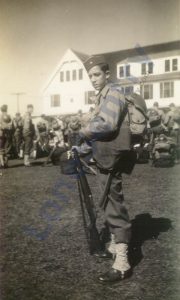 Early-War Uniform
A private photograph from 1942 showing details of the e...
Early-War Uniform
A private photograph from 1942 showing details of the e...
-
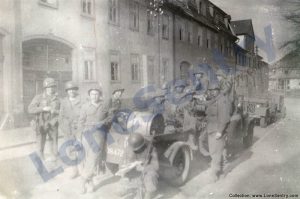 89th Infantry Division in Germany
Photographs of the U.S. Army's 89th Infantry ...
89th Infantry Division in Germany
Photographs of the U.S. Army's 89th Infantry ...
-
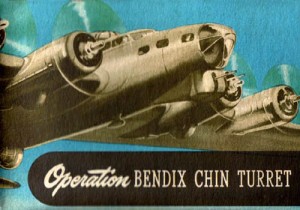 Bendix Chin Turret
Bendix manual on the Operation and Maintenance of the B...
Bendix Chin Turret
Bendix manual on the Operation and Maintenance of the B...
-
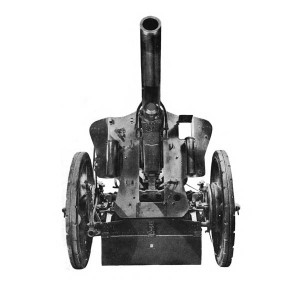 German 105-mm Howitzer
Three views of the German 105-mm howitzer (10.5 cm leFH...
German 105-mm Howitzer
Three views of the German 105-mm howitzer (10.5 cm leFH...
-
 How’s Your Sherman, Herman?
M4 Sherman Tank modification and upgrades from Army Mot...
How’s Your Sherman, Herman?
M4 Sherman Tank modification and upgrades from Army Mot...
-
Tag Archives: bomber
B-32 Dominator
Introduction to the Consolidated B-32 Dominator heavy bomber from the training manual: Airplane Commander Training Manual for the B-32 Dominator, AAF Manual 51-126-7, Headquarters Army Air Forces, 1945. The B-32’s Past The history of your B-32 Dominator starts in 1940, … Continue reading
Posted in aircraft, publications, training
Tagged aircraft, B-32, bomber, consolidated, Dominator, Model 34
Comments Off on B-32 Dominator
The Doolittle Raid
Old U.S. Air Force video of the WWII Doolittle Raid in April 1942, when B-25 Mitchell bombers took off from the U.S. Navy aircraft carrier USS Hornet to attack the Japanese islands. [ Video no longer available. ]
Big 1/32nd Scale B-25J Mitchell
Coming soon from HK Models — a huge 1/32-scale B-25J Mitchell “The Strafer”. “Strafer” is the second B-25 release from HK Models and depicts the solid nose version armed with eight .50 cal machine guns.
Thanks to the Power Turret… The Bomber Fights Back
The importance of the modern power gun turret to U.S. bombers in WW2 from Aircrewman’s Gunnery Manual, Aviation Training Division, Office of the Chief of Naval Operations, U.S. Navy, 1944 Thanks to the Turret… THE BOMBER FIGHTS BACK Without the … Continue reading
PV Ventura One-Wheel Landing
A safe one-wheel landing by a PV Ventura on a Pacific Island during WW2 from Naval Aviation News, March 15, 1945. ONE-WHEEL LANDING A PV piloted by a Lieutenant Commander made a successful one-wheel landing on a Pacific island airstrip without … Continue reading
Words from the Wing Wise
Tips from bomber gunners to prevent guns and gunners from freezing during missions from a special edition of Army Talks, “Stars over the Reich,” published for the officers and men of the Eighth Air Force. WORDS FROM THE WING … Continue reading
Posted in aircraft, publications, weapons
Tagged army talks, B-17, bomber, crew, Eighth Air Force, gun, gunner
Comments Off on Words from the Wing Wise
Idiots’ Delight
Color photograph of the B-17 Flying Fortress “Idiots’ Delight” of Eighth Air Force in England. The original caption states the M/Sgt is Penrose A. Bingham of Reading, Pennsylvania. The B-17 “Idiots’ Delight” served with the 332nd Bomb Squadron, 94th Bomb … Continue reading
Posted in aircraft, photos
Tagged aircraft, B-17, bomber, color, idiots delight, nose art, photos
4 Comments
Tail Warning Radar
Summary of Tail Warning Radar AN/APS-13 from Radar Observers’ Bombardment Information File, July 1945. Tail Warning Radar AN/APS-13 Radio Set AN/APS-13 is a lightweight radar set which gives an airplane pilot, or any other aircrew member who can see or … Continue reading
Posted in aircraft, publications, training
Tagged aircraft, bomber, publications, radar, tail warning radar, training
3 Comments