Instructions for replacing the final-drive assembly on the M4 Sherman tank, from Army Motors, Vol. 6, No. 2, Maintenance Division, Office, Chief of Ordnance, May 1945.
Replacing M4 Tank Final-Drive Assemblies
Time was when M4 medium tanks with damaged power trains had to run home to mother for mending–like little apple-filchers with buckshot in their final drive assemblies. Now, when your M4-series job (or related gun or howitzer motor carriage) has something more like dribble where the drive should be, you don’t have to pack it off to some 4th-echelon tank hospital for a slow cure. Instead, you can put in a whole new controlled differential and transmission final-drive assembly right there in the field, according to TB ORD 275.
Four of these assemblies, complete with everything but whistles, have at last been made authorized items of issue for lower echelon installation. They are:
— 1-piece differential housing, single-anchor-brake type, Ord. Part No. A5700061, Official Stock No. G104-5700061.
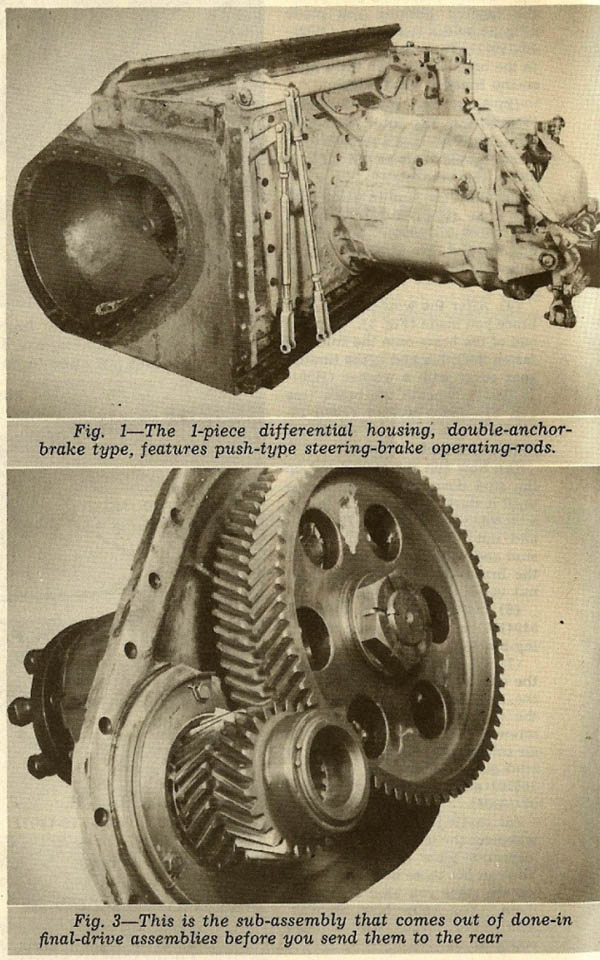
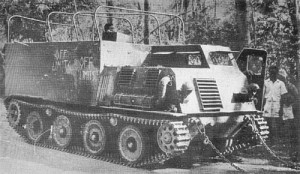
— 1-piece differential housing, double-anchor-brake type, Ord. Part No. A5700062, Official Stock No. G104-5700062 (Fig. 1).
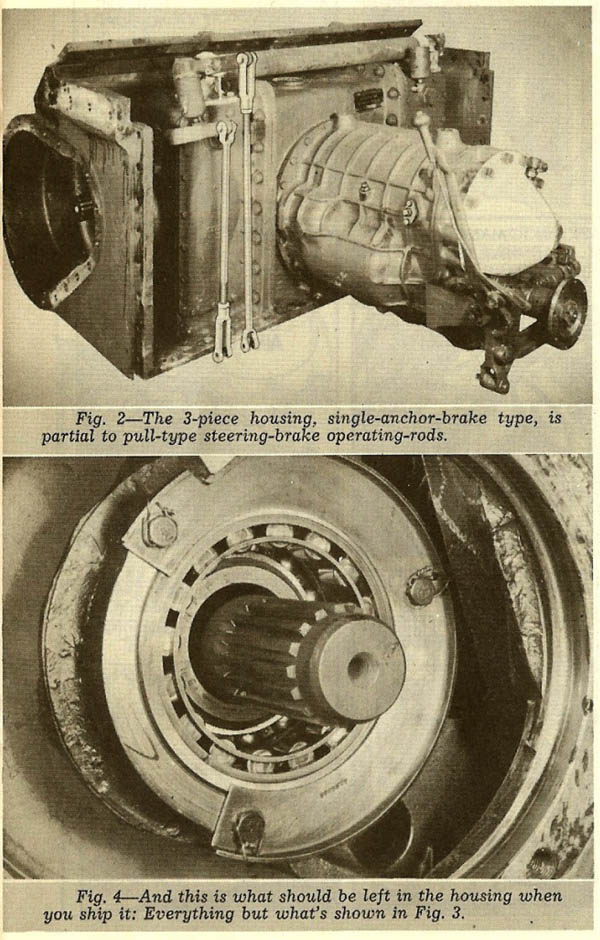
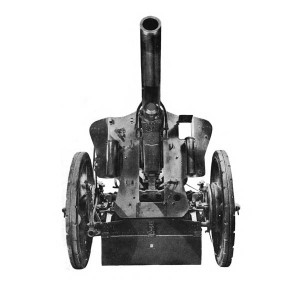
— 3-piece differential housing, single-anchor-brake type, Ord. Part A5700060, Official Stock No. G104-5700060 (Fig. 2).
— 3-piece differential housing, double-anchor-brake type, Ord. Part No. A57000196, Official Stock No. G104-57000196.
They’ll be assembled at your favorite base shop or Ordnance supply depot from parts and housings already in stock or made available through cannibalization. No important difference between any of them, and they’re all yours for the asking.
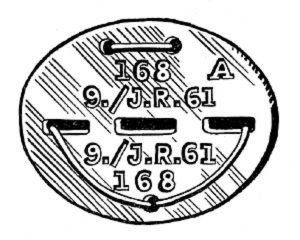
All you have to do is install ’em and send back the has-beens. But remember that the whole system will break down if you don’t send back complete assemblies. Only the final-reduction sub-assemblies (A294625) should be removed from a damaged unit before its sent to the rear for reconditioning.
The beauty of these assemblies is that they’re interchangeable in all M4-series medium tanks and related vehicles–that is, if MWO G1-W5 (steering-lever parking-brake mechanism) has been applied to the vehicle, or if it’s equipped with the later type of parking-brake steering-levers (the kind with two holes at the lower end to allow either the push or pull-type steering-brake operating-rods to be installed). As suggested in the accompanying glamor-shots–Figs. 1 and 2–the push-type rods are used on double-anchor jobs, the pull-type on single-anchor.
Anyway, when your M4 transmission suffers from shells or minen or just plain folds up, you can yank it out and put in any one of these new babies. Doesn’t matter which one unless you get a choice. If you do, of course, don’t start that eenie-meenie routine or run around looking for your weegee board. Just use the type originally installed in the vehicle.
Since there are two ways of doing the job–right and joe-dope–here are a couple of reminders:
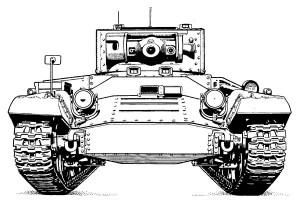
First, drain the oil from the damaged assembly and lift out the whole works (ARMY MOTORS, Oct. 44, pp. 208-210). Then take off both final-reduction sub-assemblies (A294625), leaving the outer race, roller bearing, and final-drive shafts inside the differential housing (see Figs. 3 and 4).
Removal of the sub-assemblies will leave openings, barn-door size, for dirt and water to flow into the cast-off assembly. So cover these gaps with whatever’s suitable and handy. Plywood is the number one choice; anything strong enough to keep the shaft from falling out will do. And be sure to install pipe plugs in the transmission oil-line and breathing openings. Finally, tape or cover breathers on the differential–and wipe perspiring face with one undershirt, sergeant size.
Then take a deep breath and put in the complete new assembly. Install in it the old final-reduction sub-assemblies–unless you’ve been hearing a toothless rattle coming from them in operation. Don’t use the old, beat-up gaskets if you can spare a couple of new ones. Check the linkage adjustment, preferably with a copy of TB ORD 83 tacked up in front of your eyes. Then look up the lube order for the vehicle and bring the lubricant up to its proper level.
Then hit the sack–you’ve done a job.